Gauge Ranges
In addition to the "face" and "pointer" ranges, gauges may contain additional ranges that show zones within the gauge (like 'bad', 'average', and 'good').
To add colorful ranges to the gauge follow these steps:
- Create the gauge (linear or radial)
- Define ranges array with number of of ranges
- Set min, max, and color properties for each range to define the span and color of the range.
- Optionally, set the thickness property to a value between 0-1 to determine how wide the range is (1 = 100% of available thickness).
Example:
import * as gauge from '@grapecity/wijmo.gauge';

// create the gauge with ranges
var myGauge = new gauge.RadialGauge('#myGauge', {
    value: 50,
    showRanges: true,
    ranges: [
        { min: 0, max: 30, color: 'red', thickness: .5 },
        { min: 30, max: 50, color: 'orange', thickness: .5 },
        { min: 50, max: 70, color: 'gold', thickness: .5 },
        { min: 70, max: 100, color: 'green', thickness: .5 },
    ]
  });

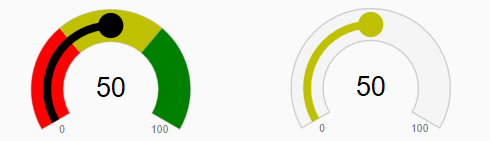
Show Ranges as Pointer Color
If you set the gauge's showRanges property to false, the additional ranges are not shown. Instead, they are used to automatically set the color of the "pointer" based on the current value.
For example:
myGauge.showRanges = false;
Stacked Ranges
Set the stackRanges property to true to show all ranges in the gauge side-by-side. This technique allows a single gauge to show multiple values.
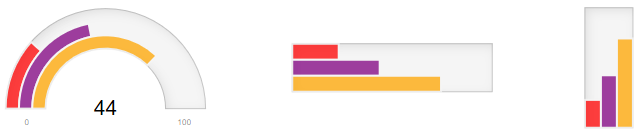
Change the max property on the range objects to update them independently.
import * as gauge from '@grapecity/wijmo.gauge';

// create the gauges
var myRadialGauge = new gauge.RadialGauge('#myRadialGauge', {
    value: 25,
    stackRanges: true,
    ranges: [
      { max: 25, color: 'red' },
      { max: 50, color: 'purple' },
      { max: 75, color: 'orange' }
      ]
});
Styling the Ranges
The color and position of the ranges is primarily defined by the value of the 'showRanges' and 'ranges' properties. But you can also control the overall style attributes of the ranges to apply a hover style.
.wj-gauge .wj-ranges {
  opacity: .25;
}
.wj-gauge:hover .wj-ranges {
  opacity: 1;
  transition: opacity 600ms;
}