Customizing Nodes
Adding Images
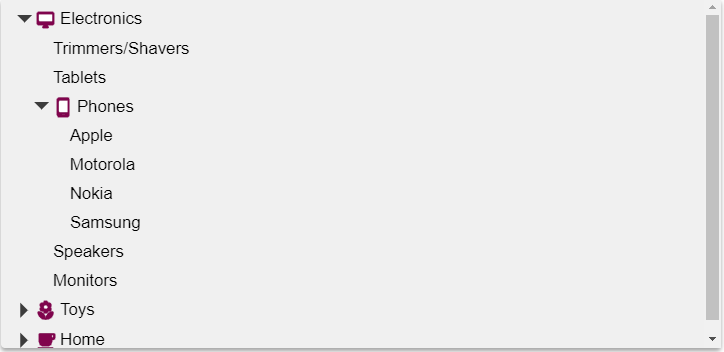
Use the imageMemberPath property to add images to nodes by specifying the name of a property on the data items that contains an image URL.

Example: Depicts some sample items in the array having an "img" property set to image URLs.
HTML
<div id="theTree"></div>
Javascript
import * as wjNav from '@grapecity/wijmo.nav';

// create the tree
var tree = new wjNav.TreeView('#theTree', {
            itemsSource: getData(),
    displayMemberPath: 'header',
            childItemsPath: 'items',
            imageMemberPath: 'img'
});

// get the tree data
function getData() {
    var imgUrl = 'https://demos.wijmo.com/5/PureJS/TreeViewIntro/TreeViewIntro/resources/';
    return [
        { header: 'Electronics', img: imgUrl + 'electronics.png', items: [
        { header: 'Trimmers/Shavers' },
                    { header: 'Tablets' },
                    { header: 'Phones', img: imgUrl + 'phones.png', items: [
            { header: 'Apple' },
                            { header: 'Motorola', newItem: true },
                            { header: 'Nokia' },
                            { header: 'Samsung' }]
            },
                    { header: 'Speakers', newItem: true },
                    { header: 'Monitors' }]
        },
            { header: 'Toys', img: imgUrl + '/toys.png', items: [
                    { header: 'Shopkins' },
                        { header: 'Train Sets' },
                        { header: 'Science Kit', newItem: true },
                        { header: 'Play-Doh' },
                        { header: 'Crayola' }]
        },
    { header: 'Home', img: imgUrl + 'home.png', items: [
                    { header: 'Coffeee Maker' },
                        { header: 'Breadmaker', newItem: true },
                        { header: 'Solar Panel', newItem: true },
                        { header: 'Work Table' },
                        { header: 'Propane Grill' }]
        }
    ];
}
Using Checkboxes
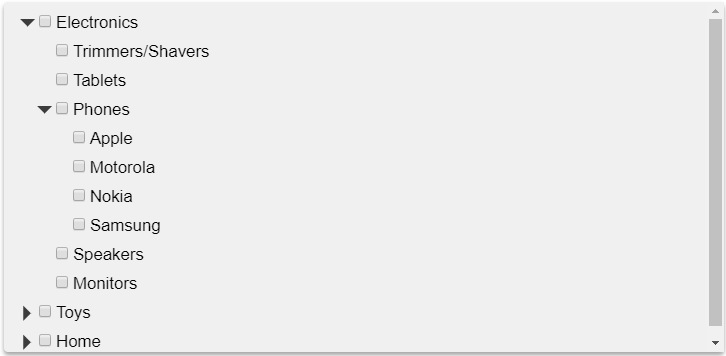
Set the showCheckboxes property to true and the TreeView will add checkboxes to each node.
When checkboxes are displayed, the TreeView manages their hierarchy, so that when a checkbox is checked or cleared, the new value is automatically applied to all child nodes, and reflected on the state of the parent nodes. The checkAllItems method can be used to toggle the state of all checkboxes on the tree.
When items are checked or unchecked, the checkedItemsChanged event is raised, and the checkedItems property is updated with a list of the items that are currently checked.

Javascript
onload = function() {

    // create the tree
  var tree = new wijmo.nav.TreeView('#theTree', {
         itemsSource: getData(),
        displayMemberPath: 'header',
        childItemsPath: 'items',
        showCheckboxes: true
    });
 }
Customizing Node Content
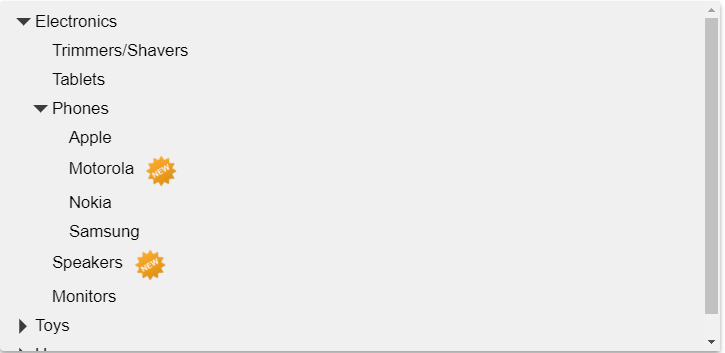
You can customize the content of the TreeView nodes using the formatItem event. The event handler parameters include the element that represents the node and the data item being rendered.
Example: Uses the formatItem event to add a "new" badge to the right of new items on the tree.

Javascript
onload = function() {

    // create the tree
  var tree = new wijmo.nav.TreeView('#theTree', {
          itemsSource: getData(),
          displayMemberPath: 'header',
          childItemsPath: 'items',
          formatItem: function(s, e) {
            if (e.dataItem.newItem) {
                var imgUrl = 'https://demos.wijmo.com/5/PureJS/TreeViewIntro/TreeViewIntro/resources/new.png';
                e.element.innerHTML +=
            '<img src="' + imgUrl + '">';
          }
        }
    });
